Hi, there! Just got back from Denver visiting my daughter and granddaughter. It was so hard to leave! We had a great time, it was Lauren's birthday and Easter.
I've created a memory folder around our 4 generations Easter basket. But, what's great, is that this folder could be about any memory. It could hold favorite photos or be about one day or stretched across the generations like mine.
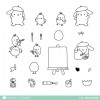
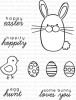
For the cover, I die cut an egg out of watercolor paper and sponged distress inks on the smooth side. The cute bunny and chicks are colored with copics.
Let's unwrap it.

When the folder is untied, there's a flap for decoration or a photo. I think this bunny face is an adorable decoration!

After the flap is opened, there is my honey bunny, Louisa! You can see the 4 generations Easter basket there to the side.

Just a little tug and there is my sweet girl, Lauren, and a photo of me from a long time ago.
In each picture, you can see the Easter basket. A little hard to see in mine, it's on the step behind me. In Lauren's photo, it's front and center, holding that adorable real bunny.

The back of the flap also has a space for decoration or a photo. I've actually added a glassine bag which holds a tag about the basket.

I got a Typecast from WeRMemory Keepers. It's like an old manual typewriter. I used it to create the tag and the labels for each photo. I used a 28 lb copy paper so it would be a little nicer than just standard copy paper.
You can see on the tag that the Easter Basket originally belonged to my uncle Eddie. I wish we had a picture of it with him!
The memory folder is easy to make. Here's how:

1. Cut 2 pieces of heavy cardstock. One at 4" x 11" and one at 4" x 6 1/4".
2. Score the two pieces as shown above.
3. Glue the 6 1/4" piece to the 11" piece overlapping by 3/4".
4. At this point, I die cut the scallops on the front and on the inside flap. Not necessary
to do anything to the front, but the inside flap does need to be trimmed or die cut at
least a small amount so that it is a little shorter and fits inside nicely. I also placed
the front piece inside an embossing folder for a little extra dimension.

5. The pictures are on a Z fold. It measures 5 1/4" x 11". Score as shown above. (Hint:
the last piece will be a little smaller than the others.) If you want to add more pictures,
just adhere another piece of cardstock and keep scoring every 3 5/8" and don't forget
to give yourself a tab.

My memory folder will be out every Easter from now on. Also, Lauren and I are both three in our pictures, so the plan is to clip into the folder 2 and 3 year old pictures of Louisa with the basket. I just love looking at the sweet memories in this folder!
And yes, Mom, I've already started one for you!
Maybe, you've got some sweet memories you'd like to hold in a memory folder. So glad you stopped by!