Showing posts with label gusseted bag. Show all posts

Sunday, November 8, 2015

VIDEO: Make A Gusseted Bag with Flap


Do you love to give a little something to someone special?  This bag might work for you.  It's a great size - about 4" x 4 3/4".  


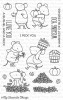
This is the exact same bag as the previous post.    I just wanted to make another one decorated with this darling stamp set!  So fun to watercolor!


I love the cutie mice with this set - but I was totally sold when I saw this sentiment!  Why?  I can't exactly say - it just made me smile.  

Here's the video:


Hope you've had a wonderful weekend - I was so looking forward to this one after a crazy-busy work week.  Can't believe it's practically gone.  It's been nice, now I've got to get ready for another crazy-busy week!

Tuesday, July 7, 2015

Tags for Download: Minc (or not)!


We're having a weird kind of day today - a high in the 70s in July!   That hardly ever happens.  That's pretty amazing, but it's still really humid.  Every hair on my head is about 4 times thicker than normal and the gray ones are really crazy!  I've gotten to where I just have to say "Oh, well...."


I picked up some great tags at Michaels the other day - all pretty, gold and shiny.   They inspired this card and the tags I have for download below.  Now this card has something really cool, besides all the  pretty gold.


It's front is a die cut panel!  I love how it's see through.


Let me give you a tip that I figured out the HARD way:  Give yourself 1/4 to 1/2" to work with at the fold.  It is REALLY hard to fold over 1/8"!

To figure out what size card base you need measure your die cut panel and add 1/4 to 1/2" to the length.  Example:  This die cut panel is 4" x 5 1/4".  The card base before trimming needs to be 4" x 5 1/2 or 5 3/4".  Score it at 5 1/4" from the bottom.  You want the base to be the same size as the die cut panel.  Fold over the extra and then trim the fold piece to about 1/8" (or the width of the frame of your die cut panel) and glue.


Okay, let's have a little more fun with tags!  You can download these HERE.

They are great for foiling with a Minc machine or printing them on different colored cardstock.

Here I printed them on yellow:


Love this paper. I think I've had it about ten years!  I so wish I knew where I got this from.  It's about 20 inches wide and came on a roll.  It is a lovely weight and texture.  It would be nice to see what they have now.  

You can see how to make a gusseted bag on THIS POST.


I also foiled all of the tags in gold, pink and teal.


Just went really simple with this.  So hard to photograph the pretty shine!  

Hope you're having a wonderful week whatever the weather is where you are!


Wednesday, December 3, 2014

Visions of Sugarplums Day Three


Welcome back!  We're right in the middle of a fun week of Christmas!  

Today I've got a couple of projects featuring graphics from Cameo Shoppe.  Cristina is one of the sponsors of Visions of Sugarplums and is generously offering a giveaway every day!


First up is a pillow box that I made with a Pillow Box Punch Board.  (I've put one of these in the Mega GiveAway.)  It is a pretty cool tool!  You can see one of Cameo Shoppe's circle images there.  Isn't the pink tree pretty?  It's a part of the Christmas Circle Tags set.


I guess I'm not tired yet of the gusseted bags.  This one is a fun size!  


I used a couple more of the pretty circle tags to create snowflakes.  I think these images are just adorable!  If you want to know how to make the 3D snowflakes, you can see them HERE.

Here's how to make the skinny bag with a rounded flap:


You need two sheets of printed paper.  Cut one panel to 6" x 10 3/4".  Score at 1/2", 1", and 1 1/2".  Also score at 4 1/2", 5", and 5 1/2".  


Turn it and score at 1/2" and 8 3/4".


Cut away the top corners on the 8 3/4" score line and on the 1/2" score line from above.  To make the rounded flap. use a circle die.  When you run it through your die cutting machine, don't run it all the way through.  Stop at the 8 3/4" score line - otherwise you'll just have cut a big circle out! 


Fold the gussets (instructions HERE).  Fold up the bottom 1/2".  Cut a second panel to 3" x 8 3/4".  Die cut a half circle into the top.   And glue it to the gusseted panel.  Fold the flap over and you're done!


      Moonlighting by Mary -  one digital set
      Kitty Bee Design - one digital image
      Studio Shine Vintage - one digital set
      Vintage Bella - two digital sets

These are a few of my favorite shops!  Thank you so much to all of them!


In your comment, please let me know that you would like to win.  Comment here and then comment on all the participating blogs listed below.  Your name will go in a hat (or basket or bowl) for your comment here.  You will also get your name put in additional times for each comment left on the other blogs.  When the prizes for one day are won, those names are taken out, but all the other names stay in the hat.  

Be sure to check back daily to see if you have won!

The Mega Giveaway grows every day and the winner will be announced Saturday, December 6th.  Everything shown in this section every day will be a part of the Mega Giveaway.  Here is the third picture:


Krista - Cameo Shoppe
Misteejay (Toni) - Vintage Bella 
Char - Cameo Shoppe
Debbie - Studio Shine Vintage
Jean - Kitty Bee Design


 Lisa
   Sandy
   Regina


Go say "Hi!" to all these lovely ladies and enjoy their Christmas projects!

See you tomorrow!


Related Posts with Thumbnails