Showing posts with label circus. Show all posts

Sunday, August 21, 2016

Circus Tent Gatefold Card Video


Hi, there!  I love shaped cards.  And this circus tent gatefold is so easy to make!  It would be perfect for a birthday card, invitation to a circus-themed party or even as a thank you.  Check out the video below.


Here's what it looks like closed.  The tent could be made in traditional red and white or any two colors you like.  And you could use twine instead of ribbon to keep it closed.


I added an additional circus character on the left flap and the right flap is to write my message.  

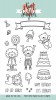
I have to say that sometimes circus characters kind of freak me out.  But these stamps are adorable.  See link below.  If you're looking for circus characters that aren't stamps, you might want to check out THIS CIRCUS STEP CARD.

Here's the video on how to make this adorable circus tent gatefold card:


So glad you stopped by and have a lovely week!

Wednesday, August 27, 2014

Cutie Circus Decorations!

Hi, there!  When was the last time you went to the circus?  I think we went one time when Lauren was little, so we're talking 25 years ago for me.   Dennis and I have been watching a show that reminds of a really awesome circus sometimes:  America's Got Talent.  We'd never watched it until this season.  Maybe they should combine several of the acts and take them on the road!


I guess America's Got Talent put me in the mood for something circus-y and then my grandma asked me to make a card for my little cousin's seventh birthday so...


Isn't this clown adorable?  I got it from Retrofair Graphics.  I don't think you have to be seven to enjoy this!


This cute circus elephant is from Studio Shine Vintage.

I can think of several ways you could use these circus decorations - cupcake toppers, party favor bag toppers, birthday bags or cards, a banner....I'm sure you can come up with many more!  Here's how easy they are to make:


Make fringe first.  I layered 6 strips of crepe paper - 2 of each color, alternating colors.   I've made fringe before by sewing down the middle, but I really think I like gluing down the middle better.  I thought it would be a great idea to cut it with fringe scissors, but mine cut way too thin strips.  There is no need for each cut to be exactly the same, just start cutting, stopping at the glue line.


Next, make the stars.  I cut three stars and glue them together.  This makes the star nice and sturdy and it holds up well to the glitter and the hot glue on the back.  The clown has stars that are displayed with wire.  I use 24 gauge wire for this.  Make a coil in the wire - the coil is great for adhering to the back of the star with hot glue.  I always glitter after adhering the star to the wire.  I hot glued the stars onto the back of the clown.


Cut off a small piece of fringe and glue to the straw.  I put a ring of glue all the way around the straw and wrapped the fringe around the straw.  Next adhere the clown, elephant or other image above the fringe.  And FLUFF the fringe.   Fun, huh?


If you want to use the decorations on a bag, a paper clip is a great way to hold it in place.


I stamped a cute ticket to use on the party favor bags I made.


Fun, sweet circus bags!


I wonder who will win America's Got Talent?


Saturday, May 3, 2014

Circus Step Card

My friend, Kim, from Altus, Oklahoma (a town my dad grew up in) asked for a circus card for her two year old grandson.  I knew I wanted to start with a circus tent, but I also wanted something a little different from the usual.   I've already made three of these cards - two more people asked for them when they saw Kim's!


I found these wonderful images at Clip Art Garden.  Aren't they fun?   I've got to head back and look at all the other goodies - I just didn't have time earlier.  I decided on a step card to showcase these fabulous circus animals.

This card was super easy to make.   Here's what you need:


You'll need four strips of decorative paper.  I love this polka paper it is from White Coffee Designs and is from the Confetti Polka Dot set.   One strip is 1 3/4" x 4 3/4" and the other three are 1" x 4 3/4". 

Score the cardstock at:


1 1/4 "
2 1/2"
3 3/4"
5"
6 1/4"
7 1/2"
9 1/4"


 After you've scored the cardstock, fold it accordion style.  The front should fold down. 

Now you're ready to decorate!


On this card the bear, elephant and lion are sized at about 3 7/8" tall.  The tent is about 4 7/8" tall.  

Adhere the polka paper on each section.  I used pop dots to adhere the animals to get a little more depth.  If you have a cutting machine you can import these images in and it will cut them for you.  (If you have a Silhouette and need help on how to do this - email me, I'm happy to help!)


The lion is holding a flaming ring and I die cut a sentiment to fit it.  You could personalize it - for example for Kim's grandson I put:  Look who's 2!  


I adore the sweet details on these animals:  like the elephant's nose.  This card is perfect for a birthday,  It looks cute folded up and also spread out!   Let's celebrate!


Wednesday, June 26, 2013

So Fun To Be One!


You may remember the circus train I did awhile back.   Grandma Kim requested a  first birthday card for Grayson (you can see his Birth-day banner here) and I thought that circus train was just the place to start.  


I still really like that train and really like how the card version turned out.  Changed some of the pink to teal and orange in hopes it would feel more boyish.  I used my copics and the circle template from My Favorite Things to add the orange dots in the background.  The template has graduated circles which makes it nice.


Hope you're having a fantastic week (Is it hot where you are?  We've been in the high 90s for several days now...)!

Related Posts with Thumbnails