Showing posts with label patriotic. Show all posts

Tuesday, June 6, 2017

Patriotic Kids


Hi, there!  Hope you're having a wonderful week.  I'll be heading off to Denver soon, so this is a great week for me!

Aren't these Patriotic Kids adorable?  Love the scotty, too.   


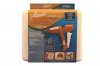
These cuties are printed on manila cardstock - white would work, too, of course.  They would make a darling card, but I always need treat holders for July 4th.  So, I made a tag for a pillow box.


Download Patriotic Kids HERE.


Dropbox seems to work differently for different people.  Either right click and save when image appears or click the download button in the top right corner.  If neither method works, email me and I'll send the files to you.

Maybe you can find a fun use for these cuties.  I don't think they have to be for July 4th.  I think they would work as just "cute kids."  

Have a wonderful rest of your week!


Sunday, June 12, 2016

Patriotic Ornament + Cute Vintage Image


July the 4th is on its way.  Our neighborhood started a parade for the little kids - they are so cute riding on their decorated bikes and wagons!   I like to decorate my house with little pieces here and there and also put a couple of pieces in my office.  This ornament is perfect for that!  It hits all my sweet and cute requirements.


This is actually pretty quick to put together.  I've got the circle piece with those cute little boys and their sweet dog ready for you to print.  I've included two circles in case you want to pop up the images like I did.  You can find the ornaments I used HERE.  (Couldn't get the picture to work for the list below.)


There are a lot of dies out there that will work for these plastic ornaments.  You may have a set of circle dies or scallop dies that would certainly work.  I wasn't quite happy with this one and added some punched holes all the way around before I glittered it up.


Next, just stack up the pieces, popping up the boys and dog if you wish.  I glued three red mini stars in the background and added some metallic star confetti.  Be sure to glue the ornament half with the open tab at the top so you can tie on the hanger.  I used Aleene's  - just running the glue along the bottom of the plastic ornament.  I just can't do it neatly enough with hot glue.


I wrapped the ornament with a silver chenille stem (actually it took a little bit of second one as well).  For that I did use hot glue, but not all the way around, just at the top, each side and the bottom.


For the decoration at the top, I glued on a couple of bows and then clipped on a further decorated clothespin.


You can download the patriotic marching boys HERE.  When you get to the image, wait just a moment and the download button will appear in the upper right corner.

So glad you came by - have a wonderful week!


Saturday, May 30, 2015

3D Glitter Star Ornaments + Free Image


Oh, my I have glitter everywhere!!  (Kitty is looking a little sparkly.)  But it doesn't seem to matter - I love these stars!  The glitter is so very pretty and that little girl is cute and sweet.  These glittery 3D stars are pretty darn easy and I think I need several more to decorate for this 4th of July.  Good thing they don't take that long to make...  Here's how:


To make these, you can use a star die or use a file for an electronic cutter (this one is from Cricut) or even hand cut stars.  My star is about 4 inches wide.  You'll need two stars per ornament - that way they'll be nice and sturdy.  I used 110 lb. cardstock.  


Fold stars on the scores.


Stack and adhere two stars together.  You'll have a nice heavy base for the glitter.


If you're going to hang them, punch a hole at the top of one of the points.  I like to use plain old Elmer's and a paintbrush when I glitter.  Let the stars dry for a bit.  Then you are ready to decorate.


If you would like to decorate with this little cutie, you can download her HERE.


Thank you so much for all your emails and concerns about the flooding here.  We have been safe and I'm so sad for those who have not been.  They have been in my thoughts and prayers.

Take care and thank you for stopping by!


Sunday, June 29, 2014

Gusseted July 4th Treat Bags

Have you had Cracker Jacks in awhile?  I loved them as a kid - now I have to say I didn't eat the peanuts, just the carmel popcorn!  I couldn't wait to find the treat - it didn't seem to matter what it was - I loved it anyway!  


For some reason when I think about Cracker Jacks, I think about being out in the front yard.  So I guess Crackers Jacks are nostalgically connected to childhood and outside fun.  So it seems they would be a perfect treat for the 4th of July.  And I don't think a regular treat bag will hold enough - so gussets are necessary!

Do you need gussets for your 4th of July treats?  Here's out to do it:


To make a gusseted bag with a finished size of 3 1/2" x 5 1/4", cut decorative paper or printed copy paper to 6 1/2" x 10 3/4".   This cute paper is from Grepic - the circus/carnival set.  You still have plenty of time if you like this paper:  it's an instant download.


Next, make your scores on the vertical sides of your paper.  Fold the paper in half top to bottom.  You only need gussets on the top half.  So cut on the 1 1/2" scores from the bottom of the paper to the middle fold.


Now, fold the gussets.  You need a valley fold in the middle.


After folding, add adhesive to top of the folded scores, fold up the bottom (back of the bag) and press firmly.  I used pinking shears across the top of my bag.


Add your goodies!  You might want to know that I got that cute patriotic pup from Cotton Field Farm.  It's an instant download too.

I wanted to link you to one of my daughter's blog posts.  She has a wonderful fresh raspberry and heavy cream dessert that would be wonderful for the hot days of summer.  She also has some fun and enlightening history on midsummer.  I wanted to rush out and buy black velvet, tiny pins, and some stockings.  You'll learn why!

Have a wonderful Fourth of July!


Thursday, June 19, 2014

3D Patriotic Star


I love flags and stars on the 4th of July!   There is something so pretty about our flag.  I love pulling up to our house and seeing the flag flying out front.  This project combines a star with our flag.  That's perfect for me!


Doesn't it look a lot like tin?  I made it from paper - really!  This paper is from Picky Chicken.  Would you like to make a 3D Patriotic Star?  Here's what you need:


I printed the stripe paper on 110lb paper double sided.  I'll tell you why a bit later.  To do the star - the way I made it - you will need two striped stars.  One will be the back. You want the stripes to go horizontal across the star.  Also, I think fat stars make the best 3D stars. Not really skinny points.  You can use a die or draw them yourself.  My star file is from Silhouette.


First you will need to score your stars.  I marked my score board with a silver sharpie so it would be easy to line up a point with its corresponding intersection.  Score all five points. 

On the blue star, only score the points marked with an asterisk.  Then cut the blue star on the score lines.


When you cut the blue star, it will be slightly off.  You just need to trim it so that you get a nice edge that lines up with a stripe.  Each star may be slightly different depending on how the stripes fall.  Glue blue piece on top of red striped star.  You may want to score again the lines that run across the blue paper.


Now you are ready for the 3D effect:  fold on all score lines.  Isn't that cool?


Punch the holes far enough from the edge, that you don't have to worry about pulling through them with the wire hanger.  Then take the back out and set aside.


You could probably glue the sequins on, but with those tiny tiny seed beads, I thought the only way to go was to sew them on.  So that's why you need a back - to cover the thread knots.  Also, it makes the star nice and thick.  I printed the star paper on both sides so that when I slip the back into the front there isn't any white showing.  It is really hard to get the two stars folded exactly the same, so it really helps to have the stripes on the other side as well!


Once you've finished sewing on the sequins and beeds, you are ready to add the hanger.  The wire I used is 20 gauge.  I added a bit of distress ink on the edges and scores.  And glitter, of course!  These make wonderful 4th of July decorations or you could clip them to a sack of sparklers or a treat.

Do you have a 4th of July tradition?  I'd love to hear about it.

Hope you're having a wonderful week!


Related Posts with Thumbnails